Whe are now going to increase the resolution four times larger, to 513x513.
| Pauli's software -> Terragen resources -> Tips and Tutorials -> Resizing terrain p.[1] [2] | 17. 01. 2005 |
DEM data is often low resolution and only allows quite a large scale view to be rendered. In order to create a realistic looking view for smaller area, it may be necessary to add some artificall details to the terrain. This tutorial describes how to do that with TerraConv and an image editor (I am using Picture Publisher 10 in this example).
|
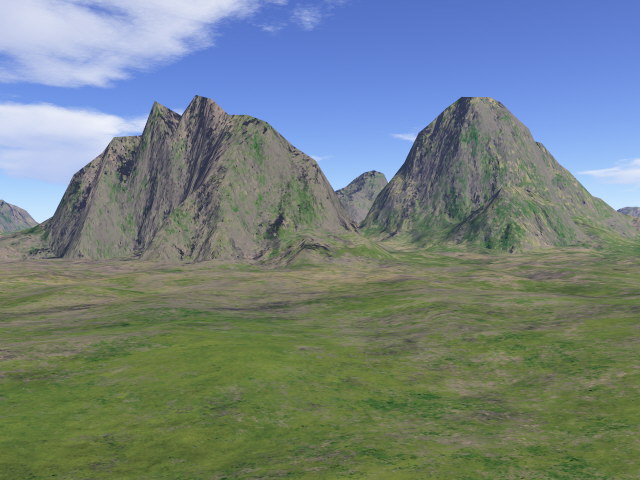
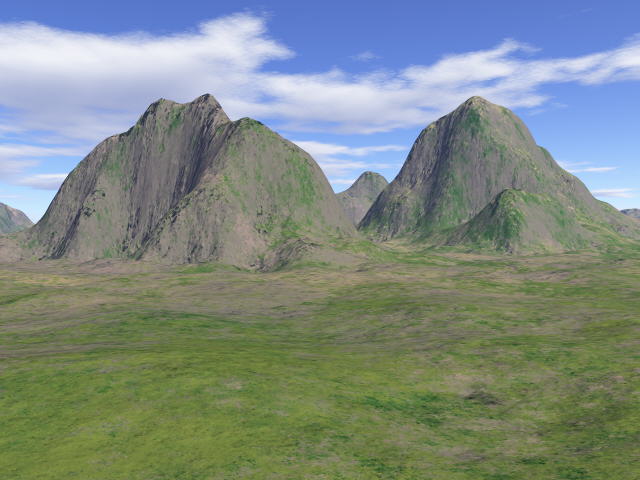
For purpose of this tutorial, I created a small 129x129 terrain.
See the image rendered using that terrain.
Straight lines caused by the low resolution are clearly visible in the mountain tops.
(Click on the thumbnail to view a larger image (640x480).)
Whe are now going to increase the resolution four times larger, to 513x513. |
|
|
(This step is not mandatory, but it makes it easier to set the scaling of the terrain after the edits have been done in the image editor.)
- Load your original terrain in Terragen. Enlarge the terrain to 513x513 (Size in the Landscape
window of Terragen). When asked if you want to adjust the point spacing to keep the real world
size, answer Yes.
- Save the enlarged terrain. (Let's call it "tmp.ter".)
- Generate a new terrain of size 513x513 using "Subdivide and displace" method and the smallest (or 2nd smallest) feature size. Set the Claciation and Canyonism settings to (near) minimum. The altitude scale is not significant, since that information is not passed to TIF file. Save the terrain (let's call it "noise.ter").
- Load the original 129x129 terrain in TerraConv and export it into TIFF format (ter129.tif).
- Load the "noise.ter" terrain in TerraConv and export it into TIFF format (noise.tif).
- Finally, load the terrain "tmp.ter" in TerraConv. No need to export it, but the
scaling data is now saved in TerraConv data file.
- Use an image editor (Photoshop, PSP, Picture Publisher, ImageMagick etc.) to resize
the original 129x129 terrain (ter129.tif) to exactly 4x size, i.e. 516x516 in this case.
- Then crob the additional 3 pixels from right and bottom edge of the image to get
a 513x513 image suitable for Terragen.
The reason why you should expand the terrain exactly to 4x size is that this way the original altitude points are preserved as much as possible, and only new points are added between them. (However, your image editor may work differently, so you may need to experiment this.)
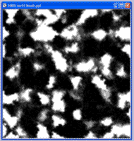
Click on the thumbnail to the right to see the difference the scaling ratio has on Pictue Publisher. ->
You can experiment with different interpolation methods. A freeware program ImageMagick has some 15 interpolation methods to choose from. Page 2 of this tutorial compares some of the methods.
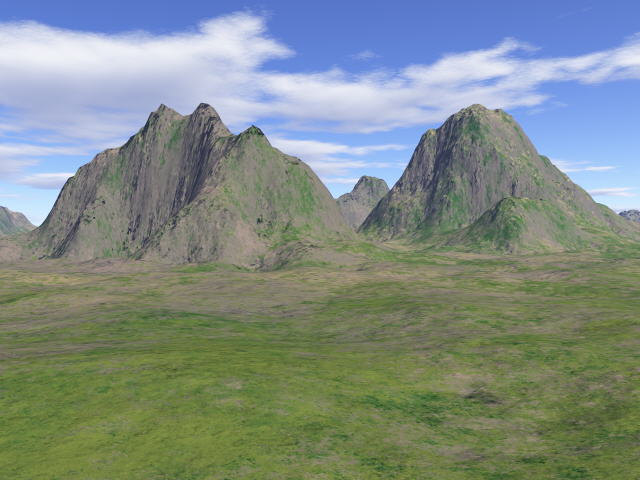
A good interpolation method, such as Mithcell or Lanczos, can give a good result as it is, without adding fractal details. Here is the same view as the original, created from terrain resized with Lanczos method. (Click the thumbnail to view 640x480 image.)
If you want to add some fractal details to your image, continue with step 5.
- Import the terrain noise.tif as an object (layer) on top of your resized original terrain.
- Switch to the layer of original terrain and create a mask that masks out the plains area
where you do not want to add the fractal noise. I used Picture Publishers Chroma Mask with 30% range
and 90% feather. This way, the edges on the mask are not too sharp.
- Switch to the layer of noise.tif. Create object from mask. Now you have noise layer that is
only visible in the mountains area. (Delete the old noise.ter layer.)
- Set the new noise layers merge mode to substractive and transparency to around 95%.
(You can adjust the amount of noise by adjusting the transparency.)
- Save the image as TIFF (with no compression).
- Import the new TIF file into TerraConv.
- Click the [ Restore ] button to set the correct scaling.
- Save the terrain.
- Load the terrain into Terragen and render.
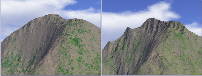
Click the thumbnail on the right to see the result.
Page 2: Comparing Resampling Methods ->